|
Evaluation of Waterhyacinth and Paddy Straw
Waste for Culture of Oyster Mushrooms
,
, ,
3
ABSTRACT
Waterhyacinth (
Eichhornia crassipes
(Mart.) Solms.) was
evaluated at ratios of 25, 50 and 75% with paddy straw (
Oryza
sativa
L.) for oyster mushroom (
Pleurotus sajor-caju)
cultivation.
There was an increase in yield with decreasing ratio
waterhyacinth. Waterhyacinth is the only growth substrate resulted
in very poor yield. However, there was an increase in
yield of 276 g with an addition of 25% waterhyacinth with
paddy straw compared to an increase of 231 g in pure paddy
straw. An average size of 38 cm
2
and weight of 5.5 g for individual
mushrooms were the highest with the addition of 50%
waterhyacinth plants to paddy straw.
Key words:
Pleurotus sajor-caju
, utilization of aquatic weeds,
oyster mushroom
and mushroom biological efficiency, protein
production,
Eichhornia crassipes, Oryza sativa
.
and lakes and lowering dissolved oxygen in the water
bodies. In African countries, waterhyacinth is used as supplementary
substrate for oyster mushroom production
(Tagwira et al. 1998). They have reported an addition of 10%
waterhyacinth supplement to a substration of sawdust and
groundnut shells increased oyster mushroom production by
250% and 221%, respectively.
Paddy straw is available abundantly in Cuddalore region
in Tamil Nadu in India. In this study, we used waterhyacinth
as a supplement to paddy straw to evaluate this aquatic plant
on the production of oyster mushroom.
MATERIALS AND METHODS
Studies were conducted during January to March 2002 in
the field office of M. S. Swaminathan Research Foundation
located at Keelamanagudi village in Chidambaram taluk of
Cuddalore district of Tamil Nadu in India. Paddy is the most
important food crop of the world and grown in a wide range
of environment. In paddy fields, rice is harvested with mechanical
harvester and the panicle together with a portion of
the stem is removed.
Paddy straw serves as a major source of cattle feed in south
India and was used as substrate in combination with waterhyacinth
for oyster mushroom culture. The study was complete
randomized block design with four replications. Treatments
consisted of waterhyacinth alone, paddy straw alone, 75%
waterhyacinth plus 25% paddy straw, 50% waterhyacinth plus
50% paddy straw and 25% waterhyacinth plus 75% paddy
straw. Oyster mushroom cultivation was conducted as suggested
by Krishnamurthy et al. (2000). Both waterhyacinth
and paddy straw were chopped into section 2 to 5 cm long,
soaked overnight in clean, fresh water. After draining excess
water, water hyacinth was mixed at 25, 50 and 75% levels with
paddy straw as per the treatment and boiled for 2 hours,
strained, cooled and dried for 24 hours under shade. The
processed plant material was used as a substrate for the cultivation
of oyster mushrooms. Beds were prepared in poly bags
with dimensions of 60 cm by 30 cm. The open end of each
bag was tied with a rubber band after adjusting the weight
with substrate to 2 kg. Each bag was punctured with 25 holes.
The bags were placed in a cropping room where the relative
humidity was maintained above 80% and bags sprinkled with
1
substrate.
Biological efficiency
was determined by the ratio of fresh mushrooms harvested
to the substrate dry weight used in the study.
Total carbon and nitrogen were estimated as suggested by
by Gomez and Gomez (1996).
RESULTS AND DISCUSSION
Harvesting of oyster mushrooms began within 13 days in
the waterhyacinth alone substrate treatment (Table 1). For
the paddy straw alone, oyster mushrooms were harvested after
17 days. The combination of waterhyacinth plus paddy
straw resulted in harvests times between the 13 and 17 days
times. The substrate of waterhyacinth and 50% waterhyacinth
plus 50% paddy straw were suitable substrates for early
harvests compared to other substrates tested. Oyster mushrooms
were harvested eight times from waterhyacinth alone
substrate whereas only six to seven harvests were made in the
remaining substrates, but no statistical differences were calculated
for the treatments. The yield data showed that the
substrate of 25% waterhyacinth in combination with 75%
paddy straw gave a significantly higher oyster mushroom production
of 276 g followed by paddy straw alone as compared
to the other treatments. The lowest yield was obtained in
75% waterhyacinth in combination with 25% paddy straw
substrate. The size and weight of individual oyster mushrooms
were not different for the various substrates. Biological
efficiency was determined as the percentage conversion
of dry substrate to oyster mushroom fresh weight, but there
were no differences among the treatments.
Biochemical analysis of the substrates used for the culture
of oyster mushroom revealed that the highest carbon and nitrogen
content were recorded in paddy straw as compared to
the other substrates (Table 2). Carbon and nitrogen content of
the paddy straw decreased after harvest compared to pre-harvest
sample. In the case of waterhyacinth the levels of carbon
and nitrogen were essentially the same after harvest as before.
This study shows that waterhyacinth can be mixed with
paddy straw at the ratio of 25:75 for production of oyster
mushrooms. By using waterhyacinth plants to produce oyster
mushrooms aquatic weed problems could be reduced to
some extent. Local villagers need to be motivated to make
use of waterhyacinth plants as a substrate in combination
with paddy straw for cultivation of oyster mushrooms as the
oyster mushrooms provide an inexpensive source of protein
for human consumption.
Mushroom Cultivation. 1
,
YIELD
OF
OYSTER
MUSHROOMS
WITH
DIFFERENT
RATIOS
OF
WATERHYACINTH
AND
PADDY
STRAW
.
Substrate (%)
Days until
first harvest
Number of
times harvested
Yield/kg
substrate (g)
Size of individual
mushroom (cm
2
)
Individual
mushroom
weight (g)
Biological
Waterhyacinth Paddy straw efficiency (%)
100 0 13 8.0 182 28.3 4.6 65
0 100 17 6.5 231 33.1 3.7 69
75 25 16 6.0 154 32.4 4.8 52
50 50 14 7.5 225 37.6 5.5 73
25 75 16 6.5 276 36.9 5.0 85
C.D. at 5% 0.99 NS 74 NS NS NS
C.D. = Critical Difference.
T
ABLE
2. A
NALYSIS
OF
SUBSTRATE
FOR
CARBON
AND
NITROGEN
.
Substrate (%) Before harvest After harvest
Waterhyacinth Paddy straw C (%) N (%) C (%) N (%)
100 0 29 2.5 30 2.6
0 100 48 4.2 29 2.5
75 25 32 2.7 29 2.5
50 50 36 3.1 24 2.0
25 75 43 3.6 26 2.2
C.D. at 5% 1 0.2 NS NS
C.D. = Critical Difference
Evaluation of Waterhyacinth and Paddy Straw
Waste for Culture of Oyster Mushrooms
1
, ABSTRACT
Waterhyacinth (
Eichhornia crassipes
(Mart.) Solms.) was
evaluated at ratios of 25, 50 and 75% with paddy straw (
Oryza
sativa
L.) for oyster mushroom (
Pleurotus sajor-caju)
cultivation.
There was an increase in yield with decreasing ratio
waterhyacinth. Waterhyacinth is the only growth substrate resulted
in very poor yield. However, there was an increase in
yield of 276 g with an addition of 25% waterhyacinth with
paddy straw compared to an increase of 231 g in pure paddy
straw. An average size of 38 cm
2
and weight of 5.5 g for individual
mushrooms were the highest with the addition of 50%
waterhyacinth plants to paddy straw.
Key words:
Pleurotus sajor-caju
, utilization of aquatic weeds,
oyster mushroom
and mushroom biological efficiency, protein
production,
Eichhornia crassipes, Oryza sativa
.
3
Technical Assistant, Field Office, M. S. Swaminathan Research Foundation,
Keelamanagudi village, Chidambaram (Tk), Cuddalore (Dt.)-608 501
Tamil Nadu, India. Received for publication February 3, 2003 and in revised
form June 4, 2003.
J. Aquat. Plant Manage.
41: 122-123
J. Aquat. Plant Manage.
41: 2003. 123
water twice a day. Mature fruiting bodies were removed from
the bags and weighed when they grew to a harvestable size.
Yield was calculated as fresh weight of mushrooms fruiting
bodies produced per kg dry substrate. Biological efficiency
was determined by the ratio of fresh mushrooms harvested
(1996).
RESULTS AND DISCUSSION
Harvesting of oyster mushrooms began within 13 days in
the waterhyacinth alone substrate treatment (Table 1). For
the paddy straw alone, oyster mushrooms were harvested after
17 days. The combination of waterhyacinth plus paddy
straw resulted in harvests times between the 13 and 17 days
times. The substrate of waterhyacinth and 50% waterhyacinth
plus 50% paddy straw were suitable substrates for early
harvests compared to other substrates tested. Oyster mushrooms
were harvested eight times from waterhyacinth alone
substrate whereas only six to seven harvests were made in the
remaining substrates, but no statistical differences were calculated
for the treatments. The yield data showed that the
substrate of 25% waterhyacinth in combination with 75%
paddy straw gave a significantly higher oyster mushroom production
of 276 g followed by paddy straw alone as compared
to the other treatments. The lowest yield was obtained in
75% waterhyacinth in combination with 25% paddy straw
substrate. The size and weight of individual oyster mushrooms
were not different for the various substrates. Biological
efficiency was determined as the percentage conversion
of dry substrate to oyster mushroom fresh weight, but there
were no differences among the treatments.
Biochemical analysis of the substrates used for the culture
of oyster mushroom revealed that the highest carbon and nitrogen
content were recorded in paddy straw as compared to
the other substrates (Table 2). Carbon and nitrogen content of
the paddy straw decreased after harvest compared to pre-harvest
sample. In the case of waterhyacinth the levels of carbon
and nitrogen were essentially the same after harvest as before.
This study shows that waterhyacinth can be mixed with
paddy straw at the ratio of 25:75 for production of oyster
mushrooms. By using waterhyacinth plants to produce oyster
mushrooms aquatic weed problems could be reduced to
some extent. Local villagers need to be motivated to make
use of waterhyacinth plants as a substrate in combination
with paddy straw for cultivation of oyster mushrooms as the
oyster mushrooms provide an inexpensive source of protein
for human consumption.
,
YIELD
OF
OYSTER
MUSHROOMS
WITH
DIFFERENT
RATIOS
OF
WATERHYACINTH
AND
PADDY
STRAW
.
Substrate (%)
Days until
first harvest
Number of
times harvested
Yield/kg
substrate (g)
Size of individual
mushroom (cm
2
)
Individual
mushroom
weight (g)
Biological
Waterhyacinth Paddy straw efficiency (%)
100 0 13 8.0 182 28.3 4.6 65
0 100 17 6.5 231 33.1 3.7 69
75 25 16 6.0 154 32.4 4.8 52
50 50 14 7.5 225 37.6 5.5 73
25 75 16 6.5 276 36.9 5.0 85
C.D. at 5% 0.99 NS 74 NS NS NS
C.D. = Critical Difference.
T
ABLE
2. A
NALYSIS
OF
SUBSTRATE
FOR
CARBON
AND
NITROGEN
.
Substrate (%) Before harvest After harvest
Waterhyacinth Paddy straw C (%) N (%) C (%) N (%)
100 0 29 2.5 30 2.6
0 100 48 4.2 29 2.5
75 25 32 2.7 29 2.5
50 50 36 3.1 24 2.0
25 75 43 3.6 26 2.2
C.D. at 5% 1 0.2 NS NS
C.D. = Critical Difference
Evaluation of Waterhyacinth and Paddy Straw
Waste for Culture of Oyster Mushrooms
L.) for oyster mushroom (
Pleurotus sajor-caju)
cultivation.
There was an increase in yield with decreasing ratio
waterhyacinth. Waterhyacinth is the only growth substrate resulted
in very poor yield. However, there was an increase in
yield of 276 g with an addition of 25% waterhyacinth with
paddy straw compared to an increase of 231 g in pure paddy
straw. An average size of 38 cm
2
and weight of 5.5 g for individual
mushrooms were the highest with the addition of 50%
waterhyacinth plants to paddy straw.
Key words:
Pleurotus sajor-caju
, utilization of aquatic weeds,
oyster mushroom
and mushroom biological efficiency, protein
production,
Eichhornia crassipes, Oryza sativa
.
INTRODUCTION
Cuddalore district in the Tamil Nadu state in India has an
abundance of waterhyacinth. This weed adversely affects the
human and animals, waterways, and agriculture by covering
the ponds and lakes and lowering dissolved oxygen in the water
bodies. In African countries, waterhyacinth is used as supplementary
substrate for oyster mushroom production
(waterhyacinth supplement to a substration of sawdust
and
groundnut shells increased oyster mushroom production by
250% and 221%, respectively.
Paddy straw is available abundantly in Cuddalore region
in Tamil Nadu in India. In this study, we used waterhyacinth
as a supplement to paddy straw to evaluate this aquatic plant
on the production of oyster mushroom.
MATERIALS AND METHODS
Studies were conducted during January to March 2010in
the field office of S,K, BHATNAGAR located at SHANKER VEEHAR DUBAGHA village
in KAKOREE LUCKNOW
important food crop of the world and grown in a wide range
of environment. In paddy fields, rice is harvested with mechanical
harvester and the panicle together with a portion of
the stem is removed.
Paddy straw serves as a major source of cattle feed in south
India and was used as substrate in combination with waterhyacinth
for oyster mushroom culture. The study was complete
randomized block design with four replications. Treatments
consisted of waterhyacinth alone, paddy straw alone, 75%
waterhyacinth plus 25% paddy straw, 50% waterhyacinth plus
50% paddy straw and 25% waterhyacinth plus 75% paddy
straw. Oyster mushroom cultivation was conducted as suggested
excess
water, water hyacinth was mixed at 25, 50 and 75% levels with
paddy straw as per the treatment and boiled for 2 hours,
strained, cooled and dried for 24 hours under shade. The
processed plant material was used as a substrate for the cultivation
of oyster mushrooms. Beds were prepared in poly bags
with dimensions of 60 cm by 30 cm. The open end of each
bag was tied with a rubber band after adjusting the weight
with substrate to 2 kg. Each bag was punctured with 25 holes.
The bags were placed in a cropping room where the relative
humidity was maintained above 80% and bags sprinkled with
1
, Technical Assistant, Field Office, M.
S. Swaminathan Research Foundation,
Keelamanagudi village, Chidambaram (Tk), Cuddalore (Dt.)-608 501
Tamil Nadu, India. Received for publication February 3, 2003 and in revised
form June 4, 2003.
17 days. The combination of waterhyacinth plus paddy
straw resulted in harvests times between the 13 and 17 days
times. The substrate of waterhyacinth and 50% waterhyacinth
plus 50% paddy straw were suitable substrates for early
harvests compared to other substrates tested. Oyster mushrooms
were harvested eight times from waterhyacinth alone
substrate whereas only six to seven harvests were made in the
remaining substrates, but no statistical differences were calculated
for the treatments. The yield data showed that the
substrate of 25% waterhyacinth in combination with 75%
paddy straw gave a significantly higher oyster mushroom production
of 276 g followed by paddy straw alone as compared
to the other treatments. The lowest yield was obtained in
75% waterhyacinth in combination with 25% paddy straw
substrate. The size and weight of individual oyster mushrooms
were not different for the various substrates. Biological
efficiency was determined as the percentage conversion
of dry substrate to oyster mushroom fresh weight, but there
were no differences among the treatments.
Biochemical analysis of the substrates used for the culture
of oyster mushroom revealed that the highest carbon and nitrogen
content were recorded in paddy straw as compared to
the other substrates (Table 2). Carbon and nitrogen content of
the paddy straw decreased after harvest compared to pre-harvest
sample. In the case of waterhyacinth the levels of carbon
and nitrogen were essentially the same after harvest as before.
This study shows that waterhyacinth can be mixed with
paddy straw at the ratio of 25:75 for production of oyster
mushrooms. By using waterhyacinth plants to produce oyster
mushrooms aquatic weed problems could be reduced to
some extent. Local villagers need to be motivated to make
use of waterhyacinth plants as a substrate in combination
with paddy straw for cultivation of oyster mushrooms as the
oyster mushrooms provide an inexpensive source of protein
for human consumption.
Tips for Growi
April 18, 2010 at 6:58 am · Filed under Flowers and Plants, Tips for Growing
Series
There are two great uses for Geraniums that make it worth growing these fine flowering plants.
Outdoors they make fantastic border plants and the red varieties are very popular in formal bedding schemes. The second use
is as a long flowering houseplant and if you deadhead and feed you plants you will get lots of geraniums from one windowsill
plant.
Geranium Cultivation
Grow from seed, plug plants or cuttings. They root quite easily from spring cuttings.
Plant
out when the danger of frost has gone.
Geraniums can go straight into a border/bed or be put in containers, troughs or
baskets.
Pinch-out the growing tip in April to encourage bushy plants.
Feed in summer with a high potash fertilizer
to encourage more blooms.
Geraniums can survive with little water so can be planted in dry conditions but they do appreciate
a drink like the rest of us.
Tips and Ideas for Planting Geraniums
Use one variety or colour and plant together to get a bold swathe of colour.
Keep you best
plants over winter in a frost free area. I use my garage windowsill.
Old plants can provide good cutting material to increase
your stock and a two year old plant often has far more bloom.
Try some scented leaved varieties of Geranium. They do not flower as well but the leaves give off a strong scent when brushed or crushed.
Indoors
I like the Dwarf and Miniature varieties which are now more widely available.
Indoor plants can be pinched
out several times to create a bush well ‘furnished’ plant before allowing it to flower.
Regal Pelargoniums are the blowsier cousins with showy colourful flowers more suitable for indoor growing.
Ivy
leaved Geraniums are trailing plants most suitable for baskets.
A wide selection of geraniums are available from Thompson Morgan
Read about the Geranium flowerheads on Gardeners Tips
Hardy Geraniums are different plants (we have really been talking about Pelargoniums). Read
about Hardy Geraniums
plants
3 Comments »
[...] Geranium growing tips on Gardeners tips [...]
Ohh so thats why my geranium doesn’t have much scent –
it’s just the plain old red granny
variety
[...] more Gardeners tips for growing Geraniums [...]
Tips for Growi
April 18, 2010 at 6:58 am · Filed under Flowers and Plants, Tips for Growing Series
There are two great uses for Geraniums that make it worth growing these fine flowering plants. Outdoors they make fantastic
border plants and the red varieties are very popular in formal bedding schemes. The second use is as a long flowering houseplant
and if you deadhead and feed you plants you will get lots of geraniums from one windowsill plant.
Geranium Cultivation
Grow from seed, plug plants or cuttings. They root quite easily from spring cuttings.
Plant out when the danger of frost
has gone.
Geraniums can go straight into a border/bed or be put in containers, troughs or baskets.
Pinch-out the growing
tip in April to encourage bushy plants.
Feed in summer with a high potash fertilizer to encourage more blooms.
Geraniums
can survive with little water so can be planted in dry conditions but they do appreciate a drink like the rest of us.
Tips and Ideas for Planting Geraniums
Use one variety or colour and plant together to get a bold swathe of colour.
Keep you best plants over winter in a frost
free area. I use my garage windowsill.
Old plants can provide good cutting material to increase your stock and a two year
old plant often has far more bloom.
Try some scented leaved varieties of Geranium. They do not flower as well but the leaves give off a strong scent when brushed or crushed.
Indoors I like the Dwarf and Miniature varieties which are now more widely available.
Indoor plants can be pinched out several times to create
a bush well ‘furnished’ plant before allowing it to flower.
Regal Pelargoniums are the blowsier cousins with showy colourful flowers more suitable for indoor growing.
Ivy leaved Geraniums are trailing
plants most suitable for baskets.
A wide selection of geraniums are available from Thompson Morgan
Read about the Geranium flowerheads on Gardeners Tips
Hardy Geraniums are different plants (we have really been talking about Pelargoniums). Read about Hardy Geraniums plants
3 Comments »
[...] Geranium growing tips on Gardeners tips [...]
Ohh so thats why my geranium doesn’t have much scent – it’s just the plain old red granny variety
[...] more Gardeners tips for growing Geraniums [...]
aa
October 20, 2010 | By Bobby In Recipes | Comments(0)
Fall is the best team of year for baking
because several things are in season. One of those things just happens to be pumpkin. Pumpkin cake is one of my favorite things
to make with pumpkin puree. This cake is delicious and very moist. Fans of pumpkin bread will love this recipe. The original recipe calls for a 12×18 inch cake pan but two 9 inch round
cake pans will work as well if you want to make a layer cake. You can add chopped walnuts into the better if you choose; I
just put them on the top. The frosting is an outstanding cream cheese frosting that goes perfect with the pumpkin flavor.
This is the perfect cake for fall, give it a try. Enjoy.
Ingredients:
2 cups white sugar
1 ¼ cups vegetable oil
1 teaspoon vanilla extract
2 cups
canned pumpkin (or fresh pumpkin puree)
4 eggs
2 cups all-purpose flour
3 teaspoons baking powder
2 teaspoons
baking soda
¼ teaspoon salt
2 teaspoons ground cinnamon
1 cup chopped walnuts (optional)
Cream cheese Frosting-
2
(8 ounce) packages cream cheese (softened)
½ cup butter (softened)
2 cups confectioners sugar
1 teaspoon vanilla
extract
Cooking Instructions:
Step 1: Pre-heat the oven to 350 degrees. Grease and flour a 12×18 inch pan. In a medium bowl sift
together flour, baking powder, baking soda, salt and cinnamon. Set aside. In a large bowl beat sugar and oil until combined.
Blend in vanilla extract and pumpkin puree. Beat in the eggs, one at a time. Gradually beat in the flour mixture. Stir in
walnuts. Pour the batter into the prepared 12×18 inch pan.
Step 2: Place into the oven and bake at 350 degrees for 30 minutes
or until a toothpick inserted into the center comes out clean. Remove from the oven and allow to cool.
Step 3: To make frosting- In a medium bowl cream together the cream cheese and butter until creamy.
Mix in the vanilla extract. Gradually beat in the confectioners sugar until the frosting has become smooth and achieved spreading
consistency. Spread the frosting over the top of the cooled cake.
October 15, 2010 | By Bobby In Recipes | Comments(1)
Shrimp bruschetta makes a great appetizer for parties. I gave these a try at Red Lobster awhile ago
and decided to make my own at home. These bruschetta use ingredients such as tomato, basil, and balsamic vinegar. The original
recipe calls for grilling the shrimp. What I did was use pre-cooked salad shrimps, thaw them and use them like that. I also
added crumbled feta cheese to the recipe. If you are looking for a great tasting appetizer for a party, give this one a try.
Enjoy.
Ingredients:
2 tablespoons olive oil
1 garlic clove (minced)
3/4lb small cooked shrimp (peeled,
deveined with tails removed)
2 roma tomatoes (seeded and chopped)
2 tablespoons fresh basil (chopped)
1 to 2 tablespoons
balsamic vinegar
1/8 teaspoon black pepper
½ cup crumbled feta cheese
1 (8 ounce) baguette (cut into ¼ inch thick
slices)
Cooking Instructions:
Step 1: Thaw salad shrimp according to package directions. In a small bowl combine olive oil and garlic.
Set aside. In a medium bowl combine shrimp, tomato, basil, balsamic vinegar and pepper. Set aside.
Step 2: Heat a grill
to medium-high heat. Brush oil mixture over baguette slices. Grill baguette slices for 1 minute on each side or until golden
brown.
Step 3: Place baguette slices on a large platter. Top with shrimp/tomato mixture. Top with feta cheese and serve.
October 13, 2010 | By Bobby In Recipes | Comments(1)
I know to some pumpkin turkey chili may sound a little odd, but surprisingly, it’s really good.
If you are worried about it having a strong pumpkin flavor, it does not. It is actually very pleasant. This is a great way
to make good use of those fresh pumpkins this time of year. You can also use canned pumpkin if you prefer. The recipe itself
is very basic; you can add additional spices such as cumin if you choose. It would also be a good idea to adjust the amount
of chili powder to your liking; some people might like a little more seasoning. You can add beans if you like, I added a can
of kidney beans and a can of black beans into the mix.
Ingredients:
1 tablespoon vegetable oil
1 cup onion (chopped)
½ cup green bell pepper (chopped)
½
cup yellow bell pepper (chopped)
1 garlic clove (minced)
1lb ground turkey
1 (14.5 ounce) can diced tomatoes
2
cups pumpkin puree
1 ½ tablespoons chili powder
½ teaspoon ground black pepper
1 dash salt
½ cup shredded cheddar
cheese
½ cup sour cream
Cooking Instructions:
Step 1: Heat vegetable oil in a large skillet over medium heat. Add onion, green pepper, yellow pepper,
and garlic. Sauté until vegetables are tender. Stir in turkey and cook until evenly browned. Drain and mix in tomatoes and
pumpkin puree.
Step 2: Season with chili powder, salt and pepper. Reduce heat to low, cover and simmer for 20 minutes.
When ready to serve top each bowl with cheddar cheese and sour cream.
(Makes 6 Servings)
October 9, 2010 | By Bobby In Recipes | Comments(1)
It’s been awhile since I have put up any recipes that make good use of fresh apples, so I figured
I would share my apple muffins recipe with everyone today. Most of you probably already have an abundance of apples ready
for use at this time of year and this recipe is perfect for that. These muffins have a delicious cinnamon topping that everyone
is sure to enjoy. Some of the ingredients in the muffins include chopped fresh apples, flour, butter, and vanilla. This is
a pretty basic recipe that is easy to make and will be out of the oven in no time at all. Enjoy.
Ingredients:
2 cups all purpose flour
1 teaspoon baking powder
1/2 teaspoon baking soda
½
teaspoon salt
½ cup butter
1 cup white sugar
2 eggs
1 ¼ teaspoons vanilla extract
1 ½ cups chopped apples
Cinnamon
topping-
1/3 cup packed brown sugar
1 tablespoon all purpose flour
1/8 teaspoon ground cinnamon
1 tablespoon butter
Cooking Instructions:
Step 1: Pre-heat the oven to 375 degrees. Grease a 12 cup muffin pan. In a medium bowl mix together
flour, baking powder, baking soda, and salt. In a large bowl beat together butter, sugar and eggs until smooth. Mix in vanilla
extract. Stir in apples and then gradually blend in the flour mixture. Spoon the mixture into the prepared muffin pan.
Step
2: To make cinnamon topping- in a small bowl mix brown sugar, flour, and cinnamon. Cut in butter until the mixture is like
coarse crumbs. Sprinkle over the tops of the batter in the muffin pan.
Step 3: Place into the oven and bake for 20 minutes
or until a toothpick comes out clean. Remove from the oven and allow to cool.
October 5, 2010 | By Bobby In Recipes | Comments(3)
If you have an abundance of zucchini this recipe for zucchini brownies might be exactly what you are
looking for. Not only are these brownies a way to put that zucchini to good use, they are also some of the best brownies I
have had in awhile. The brownies are so moist you might even have to eat them with a fork. To top things off, they are covered
in a delicious chocolate frosting. When you are making the batter you will notice it is extremely dry, almost to the point
where it’s like crumbs. This is normal and once it starts baking in the oven, the moisture from the zucchini will come
out and moisten it. These are so easy to make and delicious, it’s well worth giving them a try. Enjoy.
Ingredients:
½ cup vegetable oil
1 ½ cups white sugar
2 teaspoon vanilla extract
2 cups
all purpose flour
½ cup unsweetened cocoa powder
1 ½ teaspoons baking soda
1 teaspoon salt
2 cups zucchini (shredded)
½
cup chopped walnuts
Chocolate Frosting-
6 tablespoons unsweetened cocoa powder
¼ cup margarine
2 cups confectioners
sugar
½ cup milk
½ teaspoon vanilla extract
Cooking Instructions:
Step 1: Pre-heat the oven to 350 degrees. Grease and flour a 9×13 inch baking dish. In a large bowl
mix together oil, sugar and 2 teaspoons of vanilla extract until well blended. In another bowl combine the flour, ½ cup cocoa
powder, baking soda and salt. A little at a time stir into the sugar mixture. Fold in zucchini and walnuts. Spread the mixture
evenly into the prepared baking dish.
Step 2: Place into the oven and bake for 25-30 minutes until the brownies spring back when gently touched.
Remove from the oven and allow them to cool.
Step 3: To make the frosting- In a small saucepan over low heat melt together
the cocoa powder and margarine. Set aside to cool. In a medium bowl blend confectioner’s sugar, milk, and ½ teaspoon
vanilla extract. Stir in the margarine/cocoa mixture. Spread over cooled brownies and cut into squares.
September 29, 2010 | By Bobby In Recipes | Comments(2)
Turkey wraps make for a fantastic lunch or something to grab
on the go. Fans of ranch dressing are sure to enjoy this recipe. Preparing these wraps takes very little effort as there is
no cooking involved. All of the ingredients are placed into a flour tortilla and then wrapped up. Some of the ingredients
in these wraps include sliced cooked turkey, tomato, green pepper and cheese. Fresh deli sliced turkey works great in this
recipe. You can make changes to this recipe if you don’t like something or want to add additional vegetables or meat.
Enjoy.
Ingredients:
8 slices cooked turkey (such as deli sliced turkey)
4 (7 inch) flour tortillas
1
large tomato (thinly sliced)
1 medium green pepper (cut into thin strips)
1 cup lettuce (shredded)
1 cup shredded
cheddar cheese
1/3 cup ranch salad dressing
Cooking Instructions:
Step 1: Lay out each tortilla wrap and place 2 slices of turkey on each. Layer with tomato, green pepper,
lettuce and cheese. Drizzle with ranch dressing.
Step 2: Roll up each wrap tightly and serve.
September 21, 2010 | By Bobby In Recipes | Comments(4)
If you enjoy Greek cuisine as much as I do, you are probably a fan of the Gyro. They are served at
many popular restaurants through the United States
and the rest of the world. Incase you are wondering, Gyros are a Greek dish consisting of meat, tomato, onion, and sauce on
pita bread. The sauce, called tzatziki sauce uses ingredients such as cucumber, yogurt, sour cream, lemon juice and salt.
If you are looking over the ingredient list you might notice is a rather lengthy. Some of the items such as olives, lettuce
or tomato could be left out if you choose. I can’t say for sure but I believe this recipe is fairly authentic. This
recipe uses chicken but lamb or beef could also be used. If you are looking to add some Greek cuisine to your menu, give this
one a try. Enjoy.
Ingredients:
4 boneless skinless chicken breast halves
Marinade-
¾ cup balsamic vinaigrette
salad dressing
3 tablespoons lemon juice
1 tablespoon dried oregano
½ teaspoon ground black pepper
Tzatziki Sauce-
½
cup cucumber (shredded and seeded)
1 teaspoon kosher salt
1 cup plain yogurt
¼ cup sour cream
1 tablespoon lemon
juice
½ tablespoons rice vinegar
1 teaspoon olive oil
1 garlic clove (minced)
1 tablespoon fresh dill (chopped)
½
teaspoon greek seasoning
salt and pepper (to taste)
4 large pita bread rounds
1 heart of romaine lettuce (cut into
¼” slices)
1 red onion (thinly sliced)
1 tomato (halved and sliced)
½ cup kalamata olives
½ cup pepperoncini
1
cup crumbled feta cheese
Cooking Instructions:
Step 1: In a small bowl combine balsamic vinaigrette, juice from ½ of a lemon, oregano, and ½ teaspoon
black pepper. Place chicken a large re-sealable plastic bag. Pour marinade over the chicken, seal and refrigerate for at least
1 hour.
Step 2: To make sauce- Toss the shredded cucumber with 1 teaspoon of slat. Allow it to sit for at least 5 minutes.
In a medium bowl mix together yogurt, sour cream, 1 tablespoon lemon juice, rice vinegar, and olive oil. Season with garlic,
fresh dill, and Greek seasoning. Squeeze the cucumber to remove any excess water. Stir into the sauce. Season to taste with
kosher salt and pepper. Cover and refrigerate until ready for use.
Step 3: grease and pre-heat and outdoor grill to high eat. Remove chicken from the marinade and place
onto the grill. Discard the marinade. Cook chicken until the juices run clear and the chicken has reached an internal temperature
of 165 degrees. Remove the chicken from the grill and slice into thin strips.
Step 4: Place pita rounds on the grill and
cook for 2 minutes, until warm. Turning frequently to keep them from burning. Top each pita with chicken, lettuce, tomato,
onion, olives, and pepperoncini. Serve with tzatziki sauce and feta cheese.
(Makes 4 Servings)
September 17, 2010 | By Bobby In Recipes | Comments(2)
Chances are if you are a fan of corned beef, you have tried a Reuben sandwich. The Reuben
sandwich is one of the most famous sandwiches around the world. It is a hot sandwich layered with corned beef, sauerkraut,
Swiss cheese and Russian dressing. If you do not want to use Russian dressing, Thousand Island dressing will work in its place.
The Russian dressing is very easy to make and includes ingredients such s mayonnaise, horseradish, Worcestershire sauce, ketcup,
and chili sauce. If you need to make changes such as using a different type of bread besides rye that is fine as well. If
you are looking to make great Reuben sandwiches at home, this is the recipe for you. Enjoy.
Ingredients:
2 tablespoons butter (softened)
8 slices rye bread
8 slices Swiss cheese
3/4lb
corned beef brisket (thinly sliced)
1/2lb sauerkraut
Russian dressing
Russian Dressing-
1 cup mayonnaise
3
teaspoons minced onion
1 teaspoon prepared horseradish
1 teaspoon Worcestershire sauce
1 teaspoon dried parsley
3
tablespoons chili sauce
1 tablespoon ketchup
Cooking Instructions:
Step 1: To make Russian Dressing- In a small bowl whisk together mayonnaise, onion, horseradish, Worcestershire
sauce, parsley, chili sauce and ketchup until smooth. Chill before serving.
Step 2: Butter one side of 4 slices of bread.
Place them buttered side down on a sheet of wax paper. Top each with a slice of Swiss cheese; divide half of the corned beef
among them. Squeeze out any moisture from the sauerkraut. Divide the sauerkraut among each of the sandwiches. Top the sauerkraut
with 1-2 tablespoons of Russian dressing on each sandwich. Add another layer of corned beef and top with another slice of
Swiss cheese on each sandwich. Butter the side of the sandwich facing up.
Step 3: Pre-heat a large skillet to medium heat.
Cook the sandwiches on one side until golden brown. Use a spatula to flip the sandwiches over and finish cooking on the other
side until golden brown. Cut in half and serve.
(Makes 4 Servings)
September 14, 2010 | By Bobby In Recipes | Comments(1)
Shrimp and pasta is always a great combination, add marinara sauce into the mix and you have one fantastic
dish. Shrimp marinara is one of my favorite Italian seafood dishes and for good reason. It’s important to allow the
sauce to simmer long enough for the flavors to blend, just like any type of good pasta sauce. You can use cooked shrimp for
this recipe to save time, and it’s a great way to make good use of them. I usually like to add a little extra garlic
and some red pepper flakes for a little heat. You can also add a little white wine to the sauce if you want. This will make
a fantastic meal that seafood and spaghetti lovers are sure to enjoy. Serve with parmesan cheese and garlic bread.
Ingredients:
1 (14.5 ounce) can diced tomatoes (with juice)
1 (6 ounce) can tomato paste
½
cup water
1 medium onion (diced)
2 tablespoons fresh parsley (minced)
2 tablespoons olive oil
1 teaspoon salt
1
teaspoon dried oregano
½ teaspoon dried basil
½ teaspoon pepper
½ teaspoon red pepper flakes (optional)
1lb cooked
frozen shrimp (peeled and deveined with tails removed)
1lb spaghetti (cooked and drained)
Shredded parmesan cheese (for
serving, optional)
Cooking Instructions:
Step 1: Cook noodles according to package directions. Drain and set aside. In a large skillet (or sauce
pan) over medium-high heat add olive oil. Add garlic and onion and stir fry for 3 minutes. Add diced tomatoes, stir in tomato
paste, water, parsley, salt, oregano, basil, and pepper. Add red pepper flakes if desired. Bring to a boil, reduce heat and
simmer for at least an hour.
Step 2: Within the last few minutes of cooking, add shrimp and cook until heated through.
Serve over spaghetti and top with parmesan cheese.
(Makes 4 Servings)
September 9, 2010 | By Bobby In Recipes | Comments(0)
As fall approaches its time to get ready for some baking recipes. One of my favorite items to bake
is Bundt cakes. This recipe in particular, blueberry Bundt cake is amazingly delicious. It’s so good in fact you may
not be able to control the temptation. I can’t say this recipe is very healthy but it sure does taste great. Some of
the ingredients that go into this Bundt cake include butter, sugar, and sour cream. What’s great about this cake is
the brown sugar layer that is swirled into it. This layer consists of brown sugar, cinnamon, and pecans. When the cake has
finished baking and has cooled, you can top with your favorite icing if you choose. A basic mixture of milk and confectioners
sugar works great. Enjoy.
Ingredients:
1 cup butter (softened)
2 cups white sugar
2 eggs
1 cup sour cream
1 teaspoon
vanilla extract
1 5/8 cups all purpose flour
1 teaspoon baking powder
¼ teaspoon salt
1 cup fresh blueberries
(or frozen)
½ cup brown sugar
1 teaspoon ground cinnamon
½ cup chopped pecans
1 tablespoons confectioners’
sugar (for dusting)
Cooking Instructions:
Step 1: preheat the oven to 350 degrees. Grease and flour a 9” Bundt pan. In a large bowl cream
butter and sugar until light and fluffy. Beat in the eggs, one at a time, then stir in the sour cream and vanilla extract.
In a separate bowl combine flour, baking powder, and salt. Stir into the wet batter and mix until just blended. Fold in blueberries.
Step 2: Spoon half of the batter into the greased Bundt pan. In a small bowl combine brown sugar, cinnamon,
and pecans. Sprinkle half of this mixture over the batter in the pan. Spoon the remaining batter over the top, and then sprinkle
the remaining pecan mixture over the rest of the batter. Use a knife or spatula to swirl the sugar layer into the cake.
Step
3: Place into the oven and bake for 55 to 60 minutes or until a knife inserted into the cake comes out clean. Remove from
the oven and allow to cool on a wire rack. Remove from the pan and dust with confectioner’s sugar.
October 20, 2010 | By Bobby In Recipes | Comments(0)
Fall is the best team
of year for baking because several things are in season. One of those things just happens to be pumpkin. Pumpkin cake is one
of my favorite things to make with pumpkin puree. This cake is delicious and very moist. Fans of pumpkin bread will love this recipe. The original recipe calls for a 12×18 inch cake pan but two 9 inch round cake pans will work as well
if you want to make a layer cake. You can add chopped walnuts into the better if you choose; I just put them on the top. The
frosting is an outstanding cream cheese frosting that goes perfect with the pumpkin flavor. This is the perfect cake for fall,
give it a try. Enjoy.
Ingredients:
2 cups
white sugar
1 ¼ cups vegetable oil
1 teaspoon vanilla extract
2 cups canned pumpkin (or fresh pumpkin puree)
4
eggs
2 cups all-purpose flour
3 teaspoons baking powder
2 teaspoons baking soda
¼ teaspoon salt
2 teaspoons
ground cinnamon
1 cup chopped walnuts (optional)
Cream cheese Frosting-
2 (8 ounce) packages cream cheese (softened)
½
cup butter (softened)
2 cups confectioners sugar
1 teaspoon vanilla extract
Cooking Instructions:
Step 1: Pre-heat the
oven to 350 degrees. Grease and flour a 12×18 inch pan. In a medium bowl sift together flour, baking powder, baking soda,
salt and cinnamon. Set aside. In a large bowl beat sugar and oil until combined. Blend in vanilla extract and pumpkin puree.
Beat in the eggs, one at a time. Gradually beat in the flour mixture. Stir in walnuts. Pour the batter into the prepared 12×18
inch pan.
Step 2: Place into the oven and bake at 350 degrees for 30 minutes or until a toothpick inserted into the center
comes out clean. Remove from the oven and allow to cool.
Step 3: To make frosting-
In a medium bowl cream together the cream cheese and butter until creamy. Mix in the vanilla extract. Gradually beat in the
confectioners sugar until the frosting has become smooth and achieved spreading consistency. Spread the frosting over the
top of the cooled cake.
October 15, 2010 | By Bobby In Recipes | Comments(1)
Shrimp bruschetta
makes a great appetizer for parties. I gave these a try at Red Lobster awhile ago and decided to make my own at home. These
bruschetta use ingredients such as tomato, basil, and balsamic vinegar. The original recipe calls for grilling the shrimp.
What I did was use pre-cooked salad shrimps, thaw them and use them like that. I also added crumbled feta cheese to the recipe.
If you are looking for a great tasting appetizer for a party, give this one a try. Enjoy.
Ingredients:
2
tablespoons olive oil
1 garlic clove (minced)
3/4lb small cooked shrimp (peeled, deveined with tails removed)
2 roma
tomatoes (seeded and chopped)
2 tablespoons fresh basil (chopped)
1 to 2 tablespoons balsamic vinegar
1/8 teaspoon
black pepper
½ cup crumbled feta cheese
1 (8 ounce) baguette (cut into ¼ inch thick slices)
Cooking Instructions:
Step 1: Thaw salad
shrimp according to package directions. In a small bowl combine olive oil and garlic. Set aside. In a medium bowl combine
shrimp, tomato, basil, balsamic vinegar and pepper. Set aside.
Step 2: Heat a grill to medium-high heat. Brush oil mixture
over baguette slices. Grill baguette slices for 1 minute on each side or until golden brown.
Step 3: Place baguette slices
on a large platter. Top with shrimp/tomato mixture. Top with feta cheese and serve.
October 13, 2010 | By Bobby In Recipes | Comments(1)
I know to some pumpkin
turkey chili may sound a little odd, but surprisingly, it’s really good. If you are worried about it having a strong
pumpkin flavor, it does not. It is actually very pleasant. This is a great way to make good use of those fresh pumpkins this
time of year. You can also use canned pumpkin if you prefer. The recipe itself is very basic; you can add additional spices
such as cumin if you choose. It would also be a good idea to adjust the amount of chili powder to your liking; some people
might like a little more seasoning. You can add beans if you like, I added a can of kidney beans and a can of black beans
into the mix.
Ingredients:
1
tablespoon vegetable oil
1 cup onion (chopped)
½ cup green bell pepper (chopped)
½ cup yellow bell pepper (chopped)
1
garlic clove (minced)
1lb ground turkey
1 (14.5 ounce) can diced tomatoes
2 cups pumpkin puree
1 ½ tablespoons
chili powder
½ teaspoon ground black pepper
1 dash salt
½ cup shredded cheddar cheese
½ cup sour cream
Cooking Instructions:
Step 1: Heat vegetable
oil in a large skillet over medium heat. Add onion, green pepper, yellow pepper, and garlic. Sauté until vegetables are tender.
Stir in turkey and cook until evenly browned. Drain and mix in tomatoes and pumpkin puree.
Step 2: Season with chili powder,
salt and pepper. Reduce heat to low, cover and simmer for 20 minutes. When ready to serve top each bowl with cheddar cheese
and sour cream.
(Makes 6 Servings)
October 9, 2010 | By Bobby In Recipes | Comments(1)
It’s been awhile
since I have put up any recipes that make good use of fresh apples, so I figured I would share my apple muffins recipe with
everyone today. Most of you probably already have an abundance of apples ready for use at this time of year and this recipe
is perfect for that. These muffins have a delicious cinnamon topping that everyone is sure to enjoy. Some of the ingredients
in the muffins include chopped fresh apples, flour, butter, and vanilla. This is a pretty basic recipe that is easy to make
and will be out of the oven in no time at all. Enjoy.
Ingredients:
2
cups all purpose flour
1 teaspoon baking powder
1/2 teaspoon baking soda
½ teaspoon salt
½ cup butter
1 cup
white sugar
2 eggs
1 ¼ teaspoons vanilla extract
1 ½ cups chopped apples
Cinnamon topping-
1/3 cup packed brown
sugar
1 tablespoon all purpose flour
1/8 teaspoon ground cinnamon
1 tablespoon butter
Cooking Instructions:
Step 1: Pre-heat the
oven to 375 degrees. Grease a 12 cup muffin pan. In a medium bowl mix together flour, baking powder, baking soda, and salt.
In a large bowl beat together butter, sugar and eggs until smooth. Mix in vanilla extract. Stir in apples and then gradually
blend in the flour mixture. Spoon the mixture into the prepared muffin pan.
Step 2: To make cinnamon topping- in a small
bowl mix brown sugar, flour, and cinnamon. Cut in butter until the mixture is like coarse crumbs. Sprinkle over the tops of
the batter in the muffin pan.
Step 3: Place into the oven and bake for 20 minutes or until a toothpick comes out clean.
Remove from the oven and allow to cool.
October 5, 2010 | By Bobby In Recipes | Comments(3)
If you have an
abundance of zucchini this recipe for zucchini brownies might be exactly what you are looking for. Not only are these brownies
a way to put that zucchini to good use, they are also some of the best brownies I have had in awhile. The brownies are so
moist you might even have to eat them with a fork. To top things off, they are covered in a delicious chocolate frosting.
When you are making the batter you will notice it is extremely dry, almost to the point where it’s like crumbs. This
is normal and once it starts baking in the oven, the moisture from the zucchini will come out and moisten it. These are so
easy to make and delicious, it’s well worth giving them a try. Enjoy.
Ingredients:
½
cup vegetable oil
1 ½ cups white sugar
2 teaspoon vanilla extract
2 cups all purpose flour
½ cup unsweetened cocoa
powder
1 ½ teaspoons baking soda
1 teaspoon salt
2 cups zucchini (shredded)
½ cup chopped walnuts
Chocolate
Frosting-
6 tablespoons unsweetened cocoa powder
¼ cup margarine
2 cups confectioners sugar
½ cup milk
½ teaspoon
vanilla extract
Cooking Instructions:
Step 1: Pre-heat
the oven to 350 degrees. Grease and flour a 9×13 inch baking dish. In a large bowl mix together oil, sugar and 2 teaspoons
of vanilla extract until well blended. In another bowl combine the flour, ½ cup cocoa powder, baking soda and salt. A little
at a time stir into the sugar mixture. Fold in zucchini and walnuts. Spread the mixture evenly into the prepared baking dish.
Step 2: Place
into the oven and bake for 25-30 minutes until the brownies spring back when gently touched. Remove from the oven and allow
them to cool.
Step 3: To make the frosting- In a small saucepan over low heat melt together the cocoa powder and margarine.
Set aside to cool. In a medium bowl blend confectioner’s sugar, milk, and ½ teaspoon vanilla extract. Stir in the margarine/cocoa
mixture. Spread over cooled brownies and cut into squares.
September 29, 2010 | By Bobby In Recipes | Comments(2)
Turkey wraps make for a fantastic lunch or something to grab
on the go. Fans of ranch dressing are sure to enjoy this recipe. Preparing these wraps takes very little effort as there is
no cooking involved. All of the ingredients are placed into a flour tortilla and then wrapped up. Some of the ingredients
in these wraps include sliced cooked turkey, tomato, green pepper and cheese. Fresh deli sliced turkey works great in this
recipe. You can make changes to this recipe if you don’t like something or want to add additional vegetables or meat.
Enjoy.
Ingredients:
8 slices
cooked turkey (such as deli sliced turkey)
4 (7 inch) flour tortillas
1 large tomato (thinly sliced)
1 medium green
pepper (cut into thin strips)
1 cup lettuce (shredded)
1 cup shredded cheddar cheese
1/3 cup ranch salad dressing
Cooking Instructions:
Step 1: Lay out each
tortilla wrap and place 2 slices of turkey on each. Layer with tomato, green pepper, lettuce and cheese. Drizzle with ranch
dressing.
Step 2: Roll up each wrap tightly and serve.
September 21, 2010 | By Bobby In Recipes | Comments(4)
If you enjoy Greek
cuisine as much as I do, you are probably a fan of the Gyro. They are served at many popular restaurants through the United States and the rest of the world. Incase you are wondering,
Gyros are a Greek dish consisting of meat, tomato, onion, and sauce on pita bread. The sauce, called tzatziki sauce uses ingredients
such as cucumber, yogurt, sour cream, lemon juice and salt. If you are looking over the ingredient list you might notice is
a rather lengthy. Some of the items such as olives, lettuce or tomato could be left out if you choose. I can’t say for
sure but I believe this recipe is fairly authentic. This recipe uses chicken but lamb or beef could also be used. If you are
looking to add some Greek cuisine to your menu, give this one a try. Enjoy.
Ingredients:
4
boneless skinless chicken breast halves
Marinade-
¾ cup balsamic vinaigrette salad dressing
3 tablespoons lemon juice
1
tablespoon dried oregano
½ teaspoon ground black pepper
Tzatziki Sauce-
½ cup cucumber (shredded and seeded)
1
teaspoon kosher salt
1 cup plain yogurt
¼ cup sour cream
1 tablespoon lemon juice
½ tablespoons rice vinegar
1
teaspoon olive oil
1 garlic clove (minced)
1 tablespoon fresh dill (chopped)
½ teaspoon greek seasoning
salt and
pepper (to taste)
4 large pita bread rounds
1 heart of romaine lettuce (cut into ¼” slices)
1 red onion (thinly
sliced)
1 tomato (halved and sliced)
½ cup kalamata olives
½ cup pepperoncini
1 cup crumbled feta cheese
Cooking Instructions:
Step 1: In a small
bowl combine balsamic vinaigrette, juice from ½ of a lemon, oregano, and ½ teaspoon black pepper. Place chicken a large re-sealable
plastic bag. Pour marinade over the chicken, seal and refrigerate for at least 1 hour.
Step 2: To make sauce- Toss the
shredded cucumber with 1 teaspoon of slat. Allow it to sit for at least 5 minutes. In a medium bowl mix together yogurt, sour
cream, 1 tablespoon lemon juice, rice vinegar, and olive oil. Season with garlic, fresh dill, and Greek seasoning. Squeeze
the cucumber to remove any excess water. Stir into the sauce. Season to taste with kosher salt and pepper. Cover and refrigerate
until ready for use.
Step 3: grease and
pre-heat and outdoor grill to high eat. Remove chicken from the marinade and place onto the grill. Discard the marinade. Cook
chicken until the juices run clear and the chicken has reached an internal temperature of 165 degrees. Remove the chicken
from the grill and slice into thin strips.
Step 4: Place pita rounds on the grill and cook for 2 minutes, until warm. Turning
frequently to keep them from burning. Top each pita with chicken, lettuce, tomato, onion, olives, and pepperoncini. Serve
with tzatziki sauce and feta cheese.
(Makes 4 Servings)
September 17, 2010 | By Bobby In Recipes | Comments(2)
Chances are if you are a fan of corned beef, you have tried a Reuben sandwich. The Reuben sandwich is one of the most
famous sandwiches around the world. It is a hot sandwich layered with corned beef, sauerkraut, Swiss cheese and Russian dressing.
If you do not want to use Russian dressing, Thousand Island dressing will work in its place. The Russian dressing is very
easy to make and includes ingredients such s mayonnaise, horseradish, Worcestershire sauce, ketcup, and chili sauce. If you
need to make changes such as using a different type of bread besides rye that is fine as well. If you are looking to make
great Reuben sandwiches at home, this is the recipe for you. Enjoy.
Ingredients:
2
tablespoons butter (softened)
8 slices rye bread
8 slices Swiss cheese
3/4lb corned beef brisket (thinly sliced)
1/2lb
sauerkraut
Russian dressing
Russian Dressing-
1 cup mayonnaise
3 teaspoons minced onion
1 teaspoon prepared
horseradish
1 teaspoon Worcestershire sauce
1 teaspoon dried parsley
3 tablespoons chili sauce
1 tablespoon ketchup
Cooking Instructions:
Step 1: To make
Russian Dressing- In a small bowl whisk together mayonnaise, onion, horseradish, Worcestershire sauce, parsley, chili sauce
and ketchup until smooth. Chill before serving.
Step 2: Butter one side of 4 slices of bread. Place them buttered side
down on a sheet of wax paper. Top each with a slice of Swiss cheese; divide half of the corned beef among them. Squeeze out
any moisture from the sauerkraut. Divide the sauerkraut among each of the sandwiches. Top the sauerkraut with 1-2 tablespoons
of Russian dressing on each sandwich. Add another layer of corned beef and top with another slice of Swiss cheese on each
sandwich. Butter the side of the sandwich facing up.
Step 3: Pre-heat a large skillet to medium heat. Cook the sandwiches
on one side until golden brown. Use a spatula to flip the sandwiches over and finish cooking on the other side until golden
brown. Cut in half and serve.
(Makes 4 Servings)
September 14, 2010 | By Bobby In Recipes | Comments(1)
Shrimp and pasta
is always a great combination, add marinara sauce into the mix and you have one fantastic dish. Shrimp marinara is one of
my favorite Italian seafood dishes and for good reason. It’s important to allow the sauce to simmer long enough for
the flavors to blend, just like any type of good pasta sauce. You can use cooked shrimp for this recipe to save time, and
it’s a great way to make good use of them. I usually like to add a little extra garlic and some red pepper flakes for
a little heat. You can also add a little white wine to the sauce if you want. This will make a fantastic meal that seafood
and spaghetti lovers are sure to enjoy. Serve with parmesan cheese and garlic bread.
Ingredients:
1
(14.5 ounce) can diced tomatoes (with juice)
1 (6 ounce) can tomato paste
½ cup water
1 medium onion (diced)
2
tablespoons fresh parsley (minced)
2 tablespoons olive oil
1 teaspoon salt
1 teaspoon dried oregano
½ teaspoon
dried basil
½ teaspoon pepper
½ teaspoon red pepper flakes (optional)
1lb cooked frozen shrimp (peeled and deveined
with tails removed)
1lb spaghetti (cooked and drained)
Shredded parmesan cheese (for serving, optional)
Cooking Instructions:
Step 1: Cook noodles
according to package directions. Drain and set aside. In a large skillet (or sauce pan) over medium-high heat add olive oil.
Add garlic and onion and stir fry for 3 minutes. Add diced tomatoes, stir in tomato paste, water, parsley, salt, oregano,
basil, and pepper. Add red pepper flakes if desired. Bring to a boil, reduce heat and simmer for at least an hour.
Step
2: Within the last few minutes of cooking, add shrimp and cook until heated through. Serve over spaghetti and top with parmesan
cheese.
(Makes 4 Servings)
September 9, 2010 | By Bobby In Recipes | Comments(0)
As fall approaches
its time to get ready for some baking recipes. One of my favorite items to bake is Bundt cakes. This recipe in particular,
blueberry Bundt cake is amazingly delicious. It’s so good in fact you may not be able to control the temptation. I can’t
say this recipe is very healthy but it sure does taste great. Some of the ingredients that go into this Bundt cake include
butter, sugar, and sour cream. What’s great about this cake is the brown sugar layer that is swirled into it. This layer
consists of brown sugar, cinnamon, and pecans. When the cake has finished baking and has cooled, you can top with your favorite
icing if you choose. A basic mixture of milk and confectioners sugar works great. Enjoy.
Ingredients:
1
cup butter (softened)
2 cups white sugar
2 eggs
1 cup sour cream
1 teaspoon vanilla extract
1 5/8 cups all
purpose flour
1 teaspoon baking powder
¼ teaspoon salt
1 cup fresh blueberries (or frozen)
½ cup brown sugar
1
teaspoon ground cinnamon
½ cup chopped pecans
1 tablespoons confectioners’ sugar (for dusting)
Cooking Instructions:
Step 1: preheat
the oven to 350 degrees. Grease and flour a 9” Bundt pan. In a large bowl cream butter and sugar until light and fluffy.
Beat in the eggs, one at a time, then stir in the sour cream and vanilla extract. In a separate bowl combine flour, baking
powder, and salt. Stir into the wet batter and mix until just blended. Fold in blueberries.
Step 2: Spoon
half of the batter into the greased Bundt pan. In a small bowl combine brown sugar, cinnamon, and pecans. Sprinkle half of
this mixture over the batter in the pan. Spoon the remaining batter over the top, and then sprinkle the remaining pecan mixture
over the rest of the batter. Use a knife or spatula to swirl the sugar layer into the cake.
Step 3: Place into the oven
and bake for 55 to 60 minutes or until a knife inserted into the cake comes out clean. Remove from the oven and allow to cool on a wire rack. Remove from the pan and dust with confectioner’s sugar.
Mushrooms love dark and humid environments. To cultivate mushrooms humidifiers are
used to maintain an optimum air humidity of 95%rH.
The JetSpray humidifier is ideal for mushroom growing as it is a low energy humidifier with low running costs and the moisture released
is totally evaporated into the atmosphere. If any droplets were to precipitate out of the air and fall on to the mushrooms
it would cause brown spots to form on the fungus making them less attractive to consumers.
Smaller agricultural facilities
with up to 1,000m3 would suit the Mistifier Plus wall-mounted spray humidifier. It can provide up to 6.5 l/hr of moisture and is easy to install and operate.
MODEL ON OYSTER MUSHROOM CULTIVATION

1. Introduction
A model scheme for cultivation of Oyster mushroom (Pleurotus spp.) with commercial viability and
being bankable has been prepared keeping in view the Agro-climatic conditions and other related aspects for successful cultivation
of the mushroom and its subsequent marketing. The model proposed is to be initially implemented in the districts of
Patna and Lakhiserai. Mushroom has been identified as an activity for financing under SGSY in Lakhiserai. Apart from
this, cultivation of mushroom can be taken up on a large scale by individual entrepreneurs also. The agro-climatic conditions
as well as local availability of raw material makes mushroom cultivation an economically viable preposition in these districts.
Mushrooms, also called ‘white vegetables’ or ‘boneless vegetarian meat’
contain ample amounts of proteins , vitamins, fibers and medicines. Mushroom contains 20-35% protein (dry weight) which is
higher than those of vegetables and fruits and is of superior quality. It is considered ideal for patients of hypertension
and diabetics.
Mushroom offers prospects for converting lignocellulosic residues from agricultural fields,
forests into protein rich biomass. Such processing of agro waste not only reduces environmental pollution but the by product
of mushroom cultivation is also a good source of manure, animal feeds and soil conditioner.
Mushroom has a huge domestic and foreign market. It is estimated that there is a world market for
20 lakh tonnes per annum in which the contribution of India is negligible. In the domestic market also the availability of
mushroom is limited to cities and big towns only. Mushrooms can be not only in raw form but also in dried form. There is huge
international demand for dried mushroom and the farmers gets a farm gate price of around Rs.250 per kg for dried oyster mushroom.
There are exporters in the market who are willing to supply the spawn (seed material) and also buy the dried mushrooms.
The cultivation of Oyster mushroom or Dhingri mushroom or Pleurotus spp is relatively simple and
it can be a homestead project. The agro- climatic conditions prevailing in Bihar is conducive for mushroom cultivation especially
during the months of September to March when the temperature is 20-30 C and relative humidity is 70-80%. The production
gradually decreases during peak periods of cold from 25 December to 14 January. Even during this period, cultivation of cold
tolerant strains can be adopted. Considering its suitability to the agro-climatic region and its potential to generate employment
and income, a bankable model on cultivation of oyster mushroom has been since prepared.
Oyster Mushroom (Pleurotusspp.)
Pleurotus spp. is one of the choice edible mushrooms which can be cultivated in the tropics.
It has gained importance only in the last decade and is now being cultivated in many countries in the subtropical and temperate
zones. In Europe it is known as the oyster mushroom (P.ostreatus), while in China it is called the balone mushroom (P.abalonus
or P. cystidiosus). Several other species are now available for cultivation. These are P.sajor-caju, P.florida
(probably a variant of P.ostrcatus), P.sapidus, P.eryngii, P. columbinus, P.cornucopiae, and P.abellatus.
The different species of Pleurotus are suited to growing within a temperature range of 15 to 30oC,
P.sajor-caju is tolerant of a tropical temperature of 28-30oC although, it fruits faster and produces larger mushrooms
at 25oC during the cooler months of the year or in the highlands of the tropics. This is the species now
popularly grown in the tropical Southeast Asian countries, including India. P.abalonus prefers lower temperatures of
22-24oC and is most popular among the Chinese. P.ostreatus is the so-called low-temperature pleurotus, fruiting
mostly at 12-20oC. This species is more suited to the temperate climates of Europe and the United States, although
many growers in the USA are also producing P.sajor-caju.
Like the other mushrooms, Pleurotus spp. can be grown on various agricultural waste materials,
with the use of different technologies. They grow well on different types of lignocellulosic materials, converting the
materials into digestible and protein-rich substances suitable for animal feeds. Pleurotus spp. may be produced in the
tropics on a mixture of sawdust and rice bran, rice straw and rice bran, saw dust and ipil-ipil leaves and other combinations
of tropical wastes. Other wastes such as corncobs, cotton waste, sugarcane bagasse and laves, corn leaves, grasses,
rice hulls, and water hyacinth leaves are also good substrates for growing this mushroom (Quimio, 1986). The substrates
used in each region depend upon the availability of agricultural wastes.
Sterilization / Pasteurization
The use of a pressure cooker to sterilize Pleurotus substrate is not recommended since sterilization
kills beneficial micro organisms which are present in the substrate, as well as the harmful ones. In addition, nutrients
in the compost are broken down by sterilization into forms more favorable for the growth and development of competing micro
organisms (FAO, 1983). Thus, substrates that are sterilized are easily contaminated unless spawned under very aseptic
conditions, as in media and spawn preparation.
Steaming at 100oC (pasteurisation) is more acceptable because the cost is lower (the
steamer may only be an ordinary large-capacity casserole or a drum) and substrates thus steamed are less susceptible to contamination.
The substrate is steamed for 2-3 hours, depending on the volume and the size of the bags. When using a lower temperature
(60-70oC) as in the case of room or bulk pasteurisation, the substrates, whether in bulk or already packed in bags, are steamed
for at least 6 to 8 hours. Plate 11 shows a range of low-cost steamers designed for the tropics.
Inoculation / Spawning
Spawning is carried out aseptically; preferably using the same transfer chamber or the same inoculation
room as is used in spawn preparation.
Grain or sawdust spawn is commonly used to inoculate the substrate in bags. With grain spawn,
the bottle is shaken to separate the seeds colonized with the white mycelium. After lifting the plug and flaming the
mouth of the bottle, a few spawn grains (about 1 to 2 tsp.) are poured into the substrate bag. Both the plug of the
spawn and the plug of the compost bag are replaced and the next bags are then inoculated. The newly inoculated bags
are slightly tilted to distribute the grains evenly in the shoulder area of the bag around the neck.
For sawdust spawn, the spawn is broken up with an aseptic needle. A piece of the spawn may
then be transferred, using a long flat-spooned needle especially designed to scoop the spawn. One bottle of grain or
sawdust spawn in a 500-ml dextrose bottle is sufficient to inoculate 40 to 50 bags.
The highly industrialized method involves bulk-pasteurisation and bulk-spawning before the substrates
are distributed in beds similar to those used for Agaricus. The system is labour-saving but requires more complex equipment.
Bulk material processing and handling are highly risky for tropical mushroom cultivation due to the risk of contamination.
Incubation
The spawned compost bags are kept in a dark room until the mycelium has fully penetrated to the
bottom of the substrate. In 20 to 30 days, depending upon the substrate/substrate combination, the substrate appears
white, due to the growth of the mycelium. The bags are kept for an additional week before they are opened to check that
the mycelium is mature enough to fruit. Most strains of the mushroom form primordia after 3 to 4 weeks of mycelial growth.
The bags are opened, to initiate fruiting, inside a mushroom house.
Fruiting
A mushroom house should be used and its size will depend on the number of bags prepared at any
one time. The house may be built of Nipa, sawali, wood or concrete. Air vents on the upper walls will provide
the ventilation required for the development of the sporocarps. At the same time a small amount of light should be provided
inside the house. The walls may be covered with plastic or foam sheets to increase the relative humidity (80.95%) in
the production house.
Shelves, made from bamboo or wood, line both sides of the house. The shelves are on bamboo
frames, one shelf above the other, with about 40-50 cm space between them. They should be strong enough to hold the
bags or blocks containing the compost.
The bags are opened by removing the plug and the PVC pipe neck, then rolling down the mouth of
the bag. Alternatively, the mouth portion may be cut off with a razor blade, or the bag may be slit either criss-crossed
at four to six places, or simply slashed lengthwise. When following the latter technique, the bags may be suspended
with a rope or string. When using blocks instead of bags, the blocks are opened either completely or with only the surface
or upper portions exposed.
Fruiting requires an appropriate temperature range (20-28oC), ventilation, light moisture and humidity
(80.-95%). To provide moisture, daily watering of the substrate is required. Watering, however, should not be
so excessive that the substrate becomes waterlogged.
If the temperature inside the house rises to more than 30oC, a light water mist should be frequently
used to lower the temperature and hasten fruiting. Doors and windows may also be opened, especially at night, to allow
the cool night air to enter.
Approximately 3 to 4 days after opening the bags, mushroom primordia will begin to form.
Mature mushrooms should be ready for harvesting in another 2 to 3 days. If the substrate has not yet been completely
colonized, the onset of fruiting will be delayed.
To harvest the mushrooms, they should be grasped by the stalk and gently twisted and pulled.
A knife should not be used. If kept in a refrigerator or in a cool place, the mushrooms should remain fresh for up to
3 to 6 days.
After harvesting from the top end of the bag, the other end may be opened to allow fruiting.
The two ends are sometimes opened and allowed to fruit at the same time. After harvesting from the end portions, slits
may be made on the central portion of the bag so that more mushrooms can develop. When a sawdust substrate is used,
the harvested surface may be scraped lightly to expose a new surface for fruiting. As long as the substrate appears
white, mushrooms will continue to form under adequate environmental conditions. When it appears colorless and soft,
it is time to remove the bags from the house.
Yield
Yield ranges from about 100-200% of the dry weight of the substrate and depends on the substrate
combination as well as the way in which the substrate has been managed during the fruiting season. From personal observations,
the richer the combination and the whiter and denser the mycelium, the greater will be the mushroom yield.
To increase yield, the most common supplement used is urea or orchid fertilizer dissolved in water
(100 gm in 100 liters water). Using a plastic mist sprayer, the solution is sprayed on the surface immediately before
fruiting.
|
|
Oyster Mushroom-Expenditure and Economics |
|
|
|
|
|
Unit size : 200 Kg. Paddy straw/batch of 100 Kg. Mushrooms / batch |
|
|
|
|
|
|
|
|
A. |
Break up details of expenditure: |
Amount (Rs.) |
|
|
|
|
|
|
|
|
|
|
I. Capital Cost |
|
|
|
|
|
a) Thatched shed with wooden platform (250 sq.ft) |
250 |
50 |
12500 |
|
|
b) Vessels, heating equipments and Rocker sprayer-Set |
1 |
4000 |
4000 |
|
|
|
|
|
16500 |
|
|
|
|
|
|
|
|
II. Recurring cost (for first batch capitalised) |
|
|
|
|
|
a) Polythene bags (200 Nos.) |
200 |
3 |
600 |
|
|
b) Paddy straw (200 Kg.) |
200 |
4 |
800 |
|
|
c) Spawn 50 bottles |
50 |
14 |
700 |
|
|
d) Labour charges |
20 |
50 |
1000 |
|
|
e) Fuel cost-Lump sum |
1 |
600 |
600 |
|
|
|
|
|
3700 |
|
|
|
|
|
|
|
|
Total Cost |
|
|
20200 |
|
|
Margin @ 20% |
|
|
4040 |
|
|
Term Loan amount |
|
|
16160 |
|
|
|
|
|
|
|
B |
Assumptions |
|
|
|
Sl.No. |
Particulars / Year |
1 |
2 to 5 |
|
1 |
Recurring cost / Years |
14800 |
37000 |
|
2 |
Batches per year-No. |
4 |
10 |
|
3 |
Yield assumption (Kg.) |
400 |
1000 |
|
4 |
Sale Price (Rs. Per Kg) |
60 |
|
|
FINANCIAL INDICATORS |
|
|
|
|
|
|
Items |
I Year |
IIYear |
III Year |
IVYear |
VYear |
|
Expenditure |
14800 |
37000 |
37740 |
38495 |
39265 |
|
Income |
24000 |
60000 |
60000 |
60000 |
60000 |
|
Net Income |
9200 |
23000 |
22260 |
21505 |
20735 |
|
D.F.@ 15% |
0.870 |
0.756 |
0.658 |
0.572 |
0.497 |
|
Discounted cost |
12876 |
27972 |
24833 |
22019 |
19515 |
|
Discounted Benefits |
20880 |
45360 |
39480 |
34320 |
29820 |
|
Net present worth |
8004 |
17388 |
14647 |
12301 |
10305 |
|
N.P.V |
53773 |
|
|
|
|
|
B.C.R |
1.58 |
|
|
|
|
|
I.R.R at 16.5% |
> 50% |
|
|
|
|
|
Avg DSCR |
4.21 |
: 1 |
|
|
|
|
Repayment Schedule |
Amount in Rupees |
|
|
Year |
Loan Outstanding |
Interest @ 12% |
Net income |
Repayment |
Net Surplus or Deficit |
|
|
|
|
|
Principal |
Interest |
|
|
1 |
16160 |
1939 |
9200 |
|
1939 |
7261 |
|
2 |
16160 |
1939 |
23000 |
3232 |
1939 |
17829 |
|
3 |
12928 |
1551 |
22260 |
4848 |
1551 |
15861 |
|
4 |
8080 |
970 |
21505 |
4848 |
970 |
15688 |
|
5 |
3232 |
388 |
20735 |
3232 |
388 |
17115 |
|
|
|
|
|
|
|
|
|
|
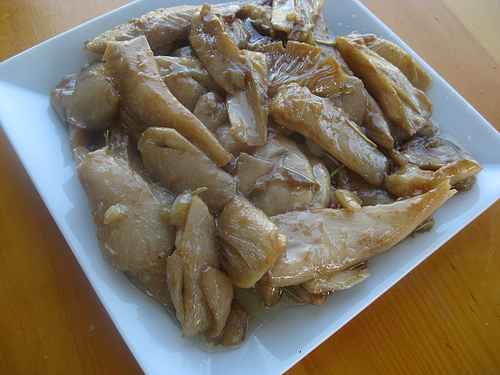
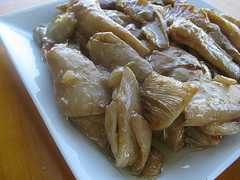
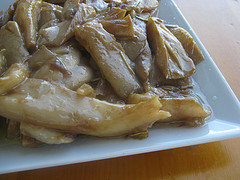
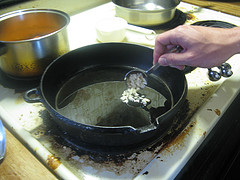
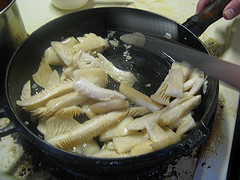


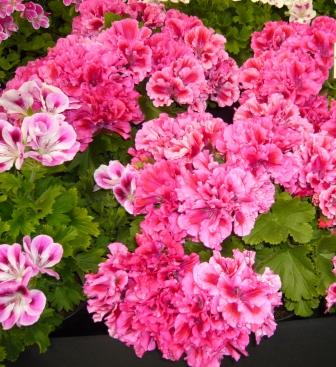
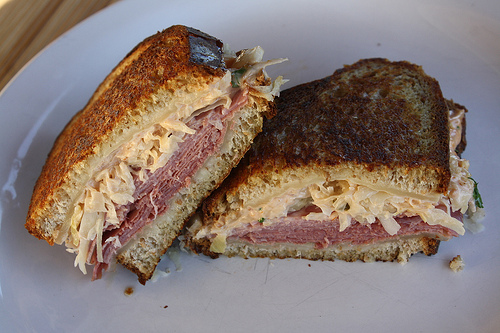
I love mushrooms and I might give this a try.
Looks delicious, will give a try:)
Those mushrooms look good! I don’t use oyster mushrooms all that often. I will have to pick some up soon.
Bobby, I just wanted to tell you that I tried your recipe and it was great. Thanks for sharing this with us.
Vani – Let me know how it turns out!
Kevin – I think oyster mushrooms are some of the best and this is a great way to make them.
Ivy – No problem, I’m glad you enjoyed the recipe!
Oyster mushrooms are so unusual aren’t they? They’re also very mild and delicious. This recipe is interesting. I went into my local Korean market and saw them dipping them in egg and then frying them with chives – I went home and made it and it was out of this world.
Thanks for sharing your Oyster mushroom recipe. The recipe looks delicious and it has inspired me to try your recipe. However, we don’t get oyster mushrooms in our place and I am going to substitute oyster mushrooms with normal button mushrooms and bamboo shoots. I hope it will turn out well.
Oyster mushrooms are my favourite ’shrooms. I’m a garlic kinda gal so I must try this dish!
giz – Oyster mushrooms are amazing and that method of cooking sounds delicious!
Curry Secrets – I think it will come out great. Let me know what you think~
Lore – They really are great, let me know how it turns out!
I love oyster mushrooms. It’s really really really really good Thanks for putting this up. I must go get some today!
Monkee – Sounds good let me know if you enjoy it as much as I did.
wonderful and a very easy recipe to follow =)
My husband was out in the woods today and brought home oyster mushrooms. I went intot he garden and got the rosemary. We ate these grat mushrooms with an elk steak. Ahh, down home cooking. I should have let the mushrooms cook longer. There’s more on that log.